Every luxury unboxing moment starts long before the tissue paper is peeled back. It begins in a factory, where flat sheets of greyboard are transformed into perfectly rigid, fabric-wrapped boxes that feel substantial in the hand. The journey from sheet to box is equal parts craft and precision engineering. Yet for many packaging converters, this journey is still plagued by bottlenecks, inconsistent corner gaps, and heavy reliance on skilled labor. Understanding the full production flow—and where modern automation fits—can change that.
Whether you are producing 500 or 50,000 boxes a month, the underlying process remains remarkably similar. The difference lies in how you connect the steps and where you eliminate manual variability. If you are building an efficient production flow that can grow with your brand customers, it pays to look at each stage critically.
Step 1: Board Selection and Precision Cutting
Rigid box integrity starts with the board. Most luxury boxes use greyboard (also called chipboard) between 1.5 mm and 3.0 mm thick, depending on the box dimensions and desired stiffness. A common rule of thumb: a box with a longest edge of 300 mm should use at least 2.0 mm board to avoid flexing. The board must be flat, smooth, and have consistent moisture content—ideally 8–10 %—to prevent warping later.
The first machine intervention is cutting. Hydraulic guillotine cutters or rotary sheeters bring the large sheets down to panel blanks. Here, accuracy is non-negotiable. An error of ±0.3 mm may not sound dramatic, but once you fold and wrap, that deviation becomes a visible gap at the corners. Many converters aim for ±0.15 mm on cut tolerances. Straight, burr-free edges also ensure that the subsequent V-grooving yields a clean fold line rather than a cracked surface.
Pro tip: If your cutting tool shows signs of dulling, replace the blade immediately. A dull blade compresses the board, creating a slight bevel that prevents the grooving tool from hitting the exact depth.
Step 2: V-Grooving – The Heart of a Clean Corner
The difference between a square-edged box that looks machine-made and a crisp, sharp-cornered luxury box often comes down to grooving. A V-shaped channel is cut into the board along the fold lines, leaving a paper-thin layer of intact board at the bottom. When folded, the board closes precisely onto itself, creating an outside corner with no exposed grey edge.
A standard 90° V-groove is cut to a depth that leaves around 0.3–0.5 mm of material. Too deep, and the board snaps during folding; too shallow, and the corner bulges. Environmental factors play a sneaky role here: on humid days, greyboard swells slightly, so operators must recalibrate depth.
This is the point in the line where throughput often stalls. Manual grooving is slow and inconsistent. That is why many mid-sized shops invest in precision V-grooving and folding units that can process multiple grooves in a single pass while maintaining depth consistency across the full sheet. The payoff is immediate: corners that meet cleanly, cycle after cycle.
Step 3: Folding and Gluing the Tray or Lid Blank
With grooves cut, the flat panel is ready to become a three-dimensional structure. Hot-melt adhesive or cold PVA glue is applied into the V-grooves—some machines use precise nozzle systems that lay a bead just wide enough to fill the channel without spilling over. The board is then folded along the grooves and held until the adhesive sets.
This is where geometry becomes tactile. For a box base or lid, the four side walls are folded up and the corner flaps are secured, either by tab-locking or by adhesive bonding. If your glue open time is too short, the bond weakens; too long, and you lose cycle speed. Hot-melt systems offer set times as fast as 2–3 seconds, which suits automated cycles well. But temperature control is critical: too hot, and you risk adhesive bleed-through on thin cover papers; too cool, and you get weak joints.
Common hiccup: Glue strings on hot-melt. These stray threads can mar the surface of the board, and later become bumps under the wrapping paper. Anti-string nozzles and precise temperature profiles make a noticeable difference.
Step 4: Cover Paper Wrapping – Where the Box Gets Its Look
Now the formed box base or lid meets its outer identity. A pre-cut piece of cover paper—usually 120–180 gsm coated art paper, textured specialty stock, or even fabric-backed paper—is glued and wrapped around the board structure. The cover paper must overhang the board by 15–20 mm on each side to fold over the edges and create a neat inner lip. Less overhang risks exposing the board; too much creates bulky corner folds.
This is the most skill-intensive step in a manual line. An operator must align the box body perfectly onto the adhesive-coated cover paper, then fold each edge smoothly without trapping air bubbles or creases. Wrapping corners at 90° without wrinkles is a craft learned over months. Even experienced staff struggle to maintain consistent quality across thousands of units per shift.
Magnetic wrapping plates, pneumatic corner folders, and vacuum alignment tables have reshaped this step. The board is held firmly, the paper is stretched uniformly, and the corner folding happens mechanically—delivering the same tension every time. For converters looking to remove the manual wrapping bottleneck, an integrated line with automated wrapping stations is often the tipping point toward scalable production.

Step 5: Assembly, Pressing, and Curing
If you are producing a book-style rigid box, the tray and lid are now joined with a hinge, often a piece of matching cover paper or a cloth strip. Magnetic closures, ribbon pulls, and inner trays are added at this assembly stage. The fully assembled boxes then go into a pressing station where pneumatic or hydraulic pressure holds them under controlled force, usually for 10–20 seconds, to guarantee perfectly flat surfaces and strong bonds.
A final curing period of up to 12 hours may still be recommended for certain PVA glues, especially in high-humidity regions. Stacking boxes too early can transfer pressure marks to the cover paper. Smart factories design their floor layout to accommodate this resting period without clogging the packing area.
Common Pitfalls That Eat Into Margins
Even with a flawless-looking sample, small process drifts can ruin a full production batch. Here are the ones we see most often in the field:
-
Moisture imbalance: Greyboard stored in dry conditions loses moisture, becomes brittle, and cracks during grooving. Conversely, damp board expands, making grooves shallow. Maintain a controlled environment (45–55 % RH) and let materials acclimate for 24 hours before processing.
-
Inconsistent grooving depth: A deviation of just 0.1 mm leads to corners that feel “sharp” because the board edge sits proud of the paper, or “soft” because the paper isn’t supported. Regular calibration and laser depth-check tools keep this in check.
-
Adhesive selection mismatch: PVA works beautifully for paper-to-board bonds but struggles with certain coated or synthetic cover stocks. Always test a small batch with the actual production materials, not just a standard test board.
-
Rushing the pressing step: Insufficient dwell time leaves subtle warps that show up only after the box has sat for a day. If your QC check only inspects boxes fresh off the line, you might be shipping latent defects.
Automation That Fits Your Scale
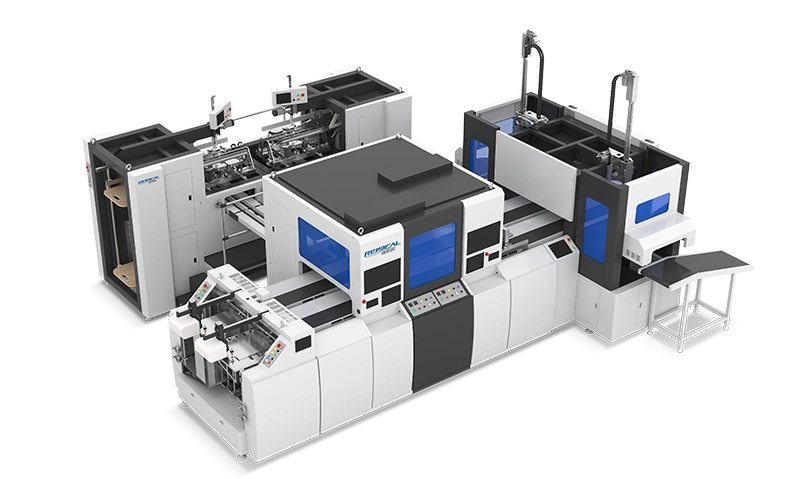
When order volumes climb and brand clients demand certified consistency, piecemeal solutions start to show their limits. A line where grooving, folding, and wrapping are linked under a unified control system eliminates transfer misalignments and drastically reduces in-process inventory. This is where automated rigid box making machines prove their value: they take the complete production flow from cut sheet to pressed box and make it repeatable with far fewer human touchpoints.
That said, automation isn’t one-size-fits-all. A box maker serving boutique cosmetics brands may need rapid size changeover and intricate corner finishes, while a high-volume electronics packaging supplier prioritizes raw speed. RUISIKE’s integrated rigid box lines address this variety through modular configurations, allowing you to right-size the investment. Whether you lean toward semi-automatic wrapping jigs or a fully automated system with inline pressing, the architecture of the flow stays consistent—it just runs at a different tempo.
Think about your current bottleneck. If your grooving station is outpacing your wrapping benches, adding more manual wrappers might not be the answer. Often, a single automated wrapping cell fed by the same grooving line can double throughput while improving corner consistency.
Bringing It All Together
The rigid box production flow—cut, groove, fold, wrap, press—is deceptively simple on paper. In practice, mastery lives in the tolerances: the 0.2 mm groove depth, the 15 mm paper overhang, the 2-second hot-melt set time. Tightening these parameters step by step is what separates a premium box from one that feels merely “fine.”
If you are evaluating where to take your production next, check technical specifications and configurations that align with your output targets and material mix. Small process upgrades compound into major quality and margin gains over a full year of production.
Disclaimer: Production figures and tolerance recommendations cited are based on commonly observed industry practices and may vary depending on specific material grades, environmental conditions, and equipment models. Always conduct your own trials under actual production conditions.