-
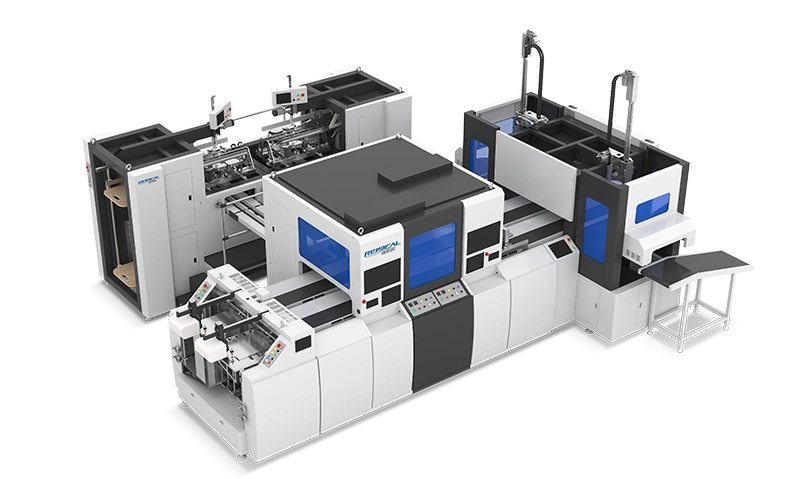
It’s a frustrating moment: you lift a freshly wrapped rigid box and feel a soft, spongy corner—or worse, spot a hairline crack in the covering paper. The instinct is to blame the greyboard thickness or the quality of the adhesive. Yet, after spending years with packaging engineers across dozens of converting plants, a different pattern emerges. More often than not, the real culprit isn’t the material. It’s the machine settings quietly drifting out of spec. Even when you run high-output automatic rigid box making machines, a tiny deviation in pressure or timing can transform a premium gift box into a customer complaint. The good news is that you can reclaim corner integrity without switching suppliers—it starts by dialing in the parameters on your rigid box forming equipment.
Weak corners aren’t a single problem; they show up as delamination, rounded edges that should be crisp, or visible tearing at the wrap fold. One mid-sized luxury packaging supplier found that 60% of its returns were traced to corner appearance or structural softness, all while the board burst strength was perfectly within spec. The root cause sat in four adjustable parameters that are often overlooked after the initial machine installation. Let’s walk through them in order of impact.
Step 1: Revisit Corner Pressing Dwell Time and Pressure
The corner pressing station—whether it uses pneumatic pads, cam-driven blocks, or profiled rollers—must deliver uniform pressure for a specific duration so the adhesive bond strengthens and the board fibers are compressed without being crushed. While many automatic rigid box making machines incorporate robust pressing units, the effective force that reaches the corner depends on air regulator settings, seal wear in the cylinders, and even the thickness of the cushioning layer on the presser foot.
Pull out a feeler gauge and check the gap at full press. In a typical setup for 2 mm greyboard, you want a residual gap of about 0.2–0.3 mm; anything larger and the adhesive won’t transfer properly, anything tighter risks crushing the substrate. Also, use a stopwatch to verify that the dwell time matches the PLC value. A veteran box plant engineer once told me, “I trust the timer on my phone more than a prox sensor that hasn’t been recalibrated in two years.” If your machine has advanced corner pressing modules with recipe storage, you can lock in these values per box style—virtually eliminating changeover drift.

Step 2: Fine-Tune Glue Application
Corner strength lives and dies by the glue bead. Too little, and the wrap peels away; too much, and the adhesive migrates, staining the cover or delaying set time. According to technical bulletins from adhesive suppliers like Henkel, cold glue applied to rigid box corners should maintain a bead diameter of 1.5–2.0 mm on each flap, applied in a continuous line no more than 3 mm from the edge.
Check your nozzles for partial clogging and verify that the application timing matches the machine’s speed. A common mistake is setting the glue pattern at slow jog speed and then running production 30% faster—the bead can stretch and skip. Use a stroboscope or high-speed camera to film the application in real production cadence. Even better, some converting lines now let you monitor glue volume per cycle on the HMI; log that data once a shift so you can spot a trending drift before defects appear.
Step 3: Verify Panel Alignment and Squaring
If the greyboard panels don’t meet with perfect parallelism, the corner will carry internal stress from the moment it’s formed. Check that the folding plates and guide rails are square to within 0.1 mm across the width of the machine bed. A simple dial indicator mount can reveal subtle misalignments caused by chain wear or accidental knocks during tooling changes. Perform the “paper strip test”: run a thin strip of paper through the closing mechanism at each corner; the indentation should be symmetrical on both sides. Asymmetric marks mean one side closes slightly before the other, creating a weak corner that will fail under stacking load.
Step 4: Match Machine Speed to Adhesive Open Time
It’s tempting to push the line rate, but rigid box adhesives have a finite open time. If the box enters the delivery conveyor before the glue has developed initial tack, the corner will relax and lose its shape. Conversely, a dwell that’s too long can cause the adhesive to skin over, resulting in a cold bond. Consult your adhesive’s technical data sheet for open time and subtract the travel distance between the glue station and the pressing unit. As a rule of thumb, maintain a buffer of at least 15% of the open time. If the math doesn’t add up, you may need to adjust the layout or consider automated rigid box assembly solutions that offer extended pressing zones and servo-controlled indexing to maintain bonding integrity at higher output.
Prevention: From Crisis Fix to Daily Discipline
Next-generation automatic rigid box making machines often include self-diagnostic tools that flag pressure loss or positioning errors, but no sensor replaces a disciplined PM routine. Add these three checks to your daily or weekly list: inspect presser foot cushions for compression set, run the glue nozzle purge cycle and weigh the output, and measure three boxes from each line with a corner squareness gauge. Record the readings in a shared log so operators on different shifts can see the trend line. This transforms corner quality from an art into a managed parameter.
If you’re ready to move beyond constant tweaking and want equipment that puts corner integrity at the center of its design, it’s worth exploring how purpose-built technology can help. RUISIKE, a supplier focused on rigid box forming technology, has engineered its high-speed rigid box finishing lines with programmable corner pressing, closed-loop glue monitoring, and rapid changeover features that keep critical settings locked in from job to job. To understand which configuration matches your product mix and volume, view the full specification and setup options.
Disclaimer: The adjustment values mentioned above are based on typical production environments and general best practices. Always refer to your machine manual, adhesive supplier guidelines, and relevant occupational safety regulations before making modifications.